
Accessible Video Making with InstaMorph

Welcome to part three in our series on easy approaches to creating accessible videos. Part one discussed the iOS app, Clips, for its live captioning feature. Part two discussed YouDescribe, the online audio description tool. And now part three builds on these lessons and demonstrates InstaMorph, a moldable plastic your AT3 Center News and Tips editor has always wanted to play with.
I trust that got your attention. No, we cannot make an accessible video with moldable plastic.
However, the video embedded below, “Demystifying InstaMorph: An Accessible Video,” was inspired by Eileen Belton of the Missouri AT Program (MoAT). Belton taught herself to create accessible videos using an older model iPad and an outdated copy of iMovie. (See “AT Users Make the Case for Web Accessibility“).
Since iMovie resides neglected on my first generation iPad Mini, I thought I’d give it a try and make an InstaMorph pen grip in the process. My motivation was to use iMovie as Belton had, to ensure my video could be understood by individuals with visual impairments.
For MoAT’s video series, Belton used the iMovie feature that allows adding a second audio track. She used this feature to voice over her videos’ title slides. This was my plan too.
Clips App for Video Editing
I recorded my video using the Clips app on my phone (discussed in part one). I used Clips because I’d just learned to use it and knew I could easily record and stitch together multiple video segments, add title slides (“posters”), and rearrange them by selecting and dragging them around with my finger on my video project timeline. This was reasonably intuitive and quite fun.
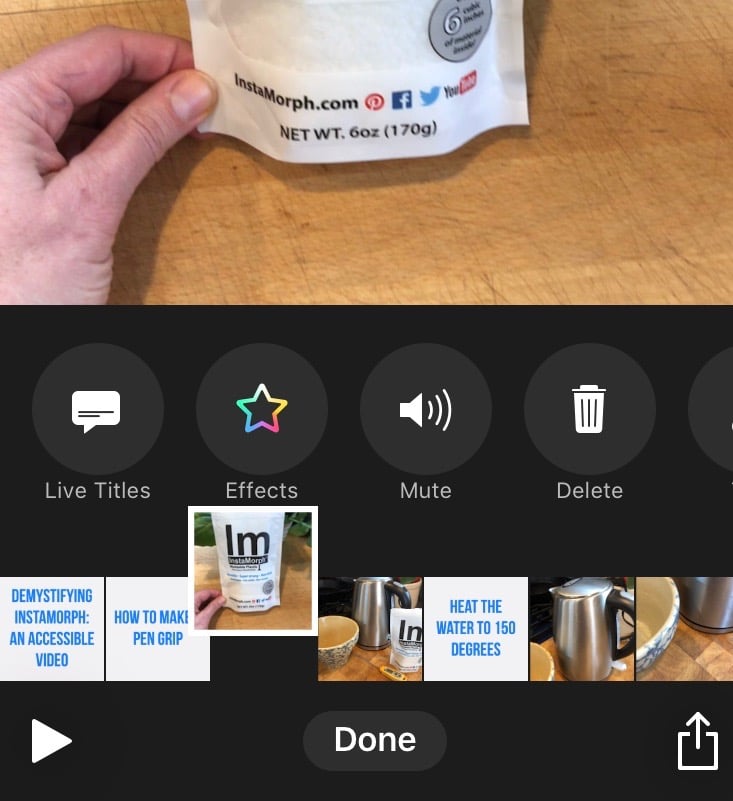
Clips app screenshot detail
YouTube Captions for Accessibility
I chose to forgo the Clips captioning feature, however, because I planned to use YouTube’s captioning tools. As mentioned at the conclusion of part two, YouTube’s closed captions are adjustable via YouTube preferences. This is an accessibility advantage for persons with certain visual impairments who are also deaf/hard of hearing and rely on captioning. Below is a screenshot of the subtitles options menu. Font, color, opacity and size, background color and opacity, window color and opacity, and character edge style may all be customized and retained as the viewer’s default.
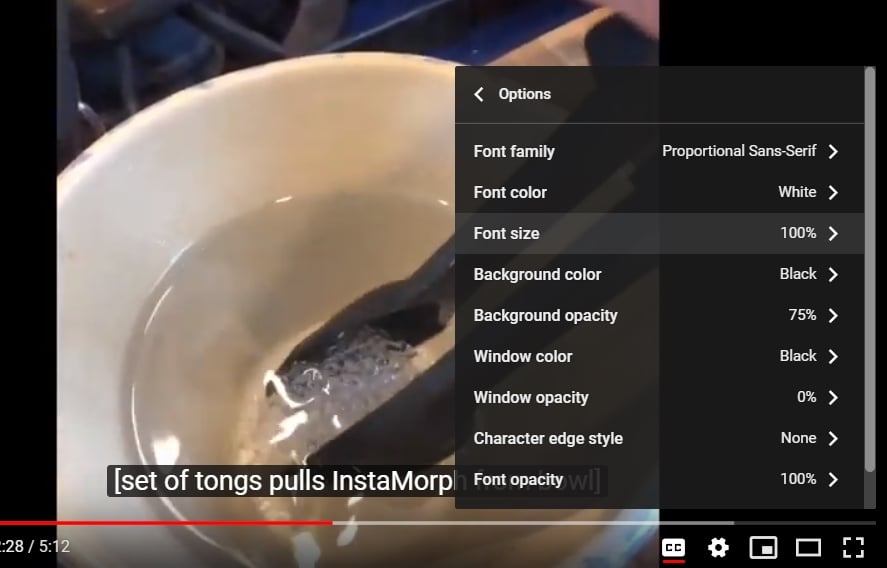
The YouTube player’s subtitles options menu
Adding Audio Description with iMovie
Neither YouTube nor Clips can be used to add a second audio track for voice-over or audio description, just music. This is why it’s helpful to consider that copy of iMovie you may have uploaded at one time for your kid to play with (as in my case). I had not tried it before now.
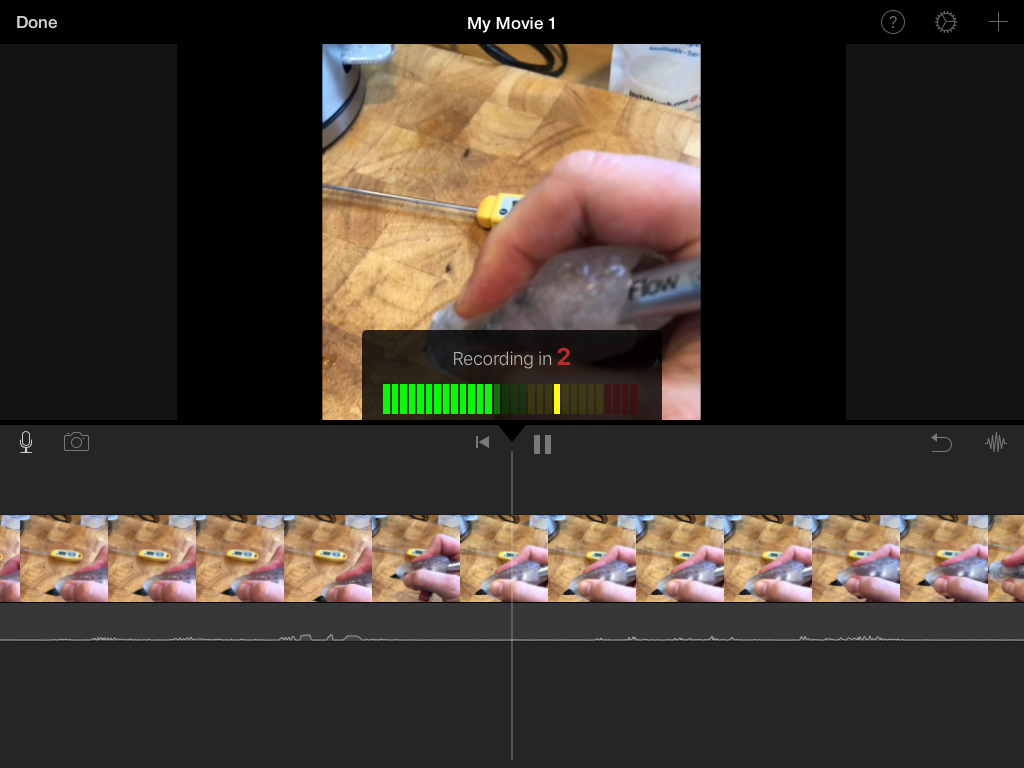
iMovie screenshot detail with mic selected for recording a voiceover audio track. (Arrow locates microphone icon.)
What I’ve learned, however, is that best practice is to script my demonstration video as descriptively as possible from the start and rely less on retrofitting audio description. This is a universal design approach and in this way, I avoid the need for extended audio tracks. I did, however, add two instances of inline audio description where I needed them, in addition to voice-over for my title slides. (See 2:27 and 4:08 below).
Adding a second audio track was easy with iMovie and I found there was little risk of messing up the project. I selected where on the video timeline I wanted to record audio, tapped the microphone icon, tapped record, and a visual and auditory three-second count down alerted me to exactly when I should commence speaking.
I ended my recordings with another tap and found I had the opportunity to review how I sounded before discarding or saving the track. I did try to vary my vocal style for these tracks so as to contrast with the video’s primary audio.
Once complete, I uploaded my described video to YouTube for auto-captions and captions editing. The wonderful thing about YouTube’s captions editor is that the auto-captions often need just a few corrections. For example, in a recent post I uploaded a YouTube video I had made of a man discussing pressure sores. In one location “pressure” had been captioned “precious.” This was easily corrected at the captions editor (learn more about editing YouTube captions).
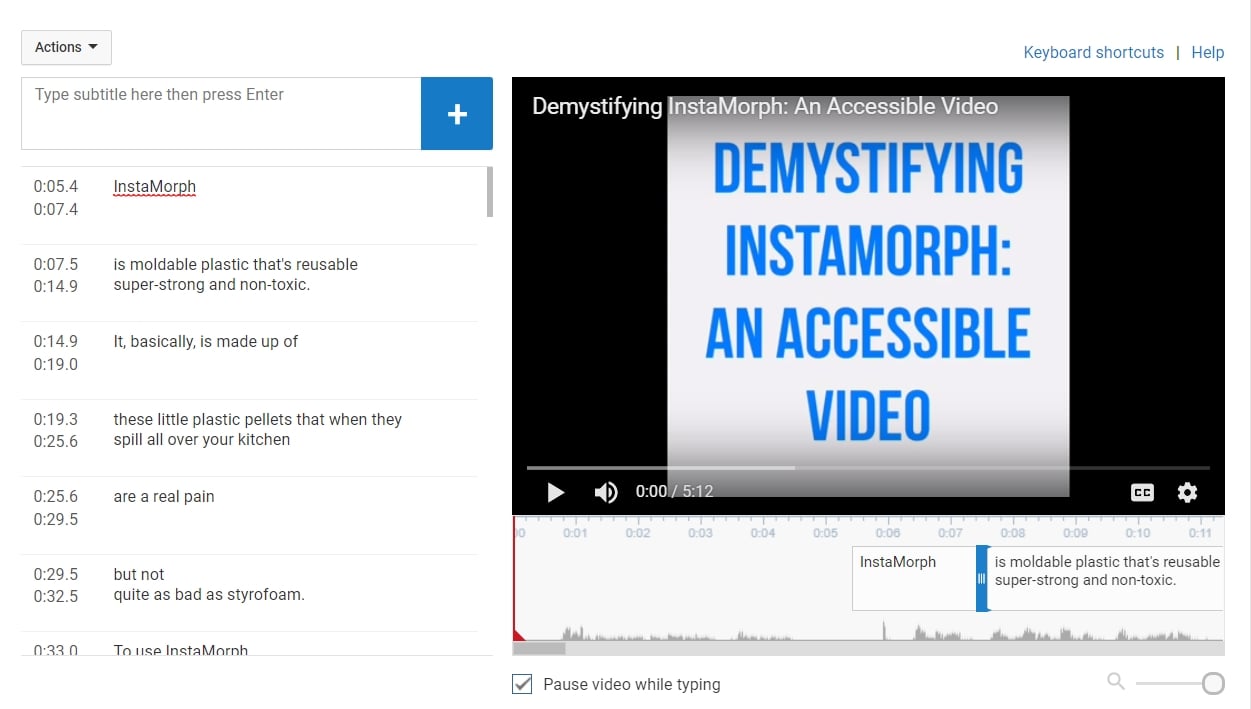
YouTube’s captions editor
- Planned my video mindful of description.
- Filmed in segments using the Clips app on my iPhone (which has a superior camera compared with my outdated iPad Mini). Inserted title slides between segments using the “posters” feature.
- Saved my Clips project and uploaded to my iPad for use with iMovie (accomplished via Dropbox but airdrop might have worked; it’s an old iPad however).
- Opened my video in iMovie and added a second audio track for voice over and audio description.
- Saved my iMovie project and uploaded directly to YouTube.
- Opened in YouTube to edit auto-captions for accuracy.
- Embedded the video here for sharing on the blog.
Of course, I could have created my entire video in iMovie to begin with, but Clips looked easier and I liked that I had a title slide option. iMovie, however, allows for overlaying titles and provides different styles for transitions between segments, which Clips does not. I recommend exploring the features of each and considering the pros and cons of different methods of rendering a project accessible. Certainly, it’s an advantage to complete the project using one app and iMovie has a nice interface for the iPhone. Next time!
Learn more about Clips
Learn more about iMovie
Learn Captioning Standards
Monthly Blog Digest
Search the blog
State AT Program Blogs
California
Florida
Indiana
Kentucky
Louisiana
Maryland
Massachusetts
Michigan
Montana
North Carolina
North Dakota
Utah
State AT Program Blogs
The AT3 Center, the Association of AT Act Programs (ATAP), and the Administration on Community Living (ACL) make no endorsement, representation, or warranty expressed or implied for any product, device, or information set forth in this blog. The AT3 Center, ATAP, and ACL have not examined, reviewed, or tested any product or device hereto referred.


Related Posts
If you enjoyed this post, then please explore other articles below.